Content
Comparing Inpainting Techniques: Midjourney vs Photoshop
Comparing Inpainting Techniques: Midjourney vs Photoshop
Comparing Inpainting Techniques: Midjourney vs Photoshop
Danny Roman
August 5, 2024
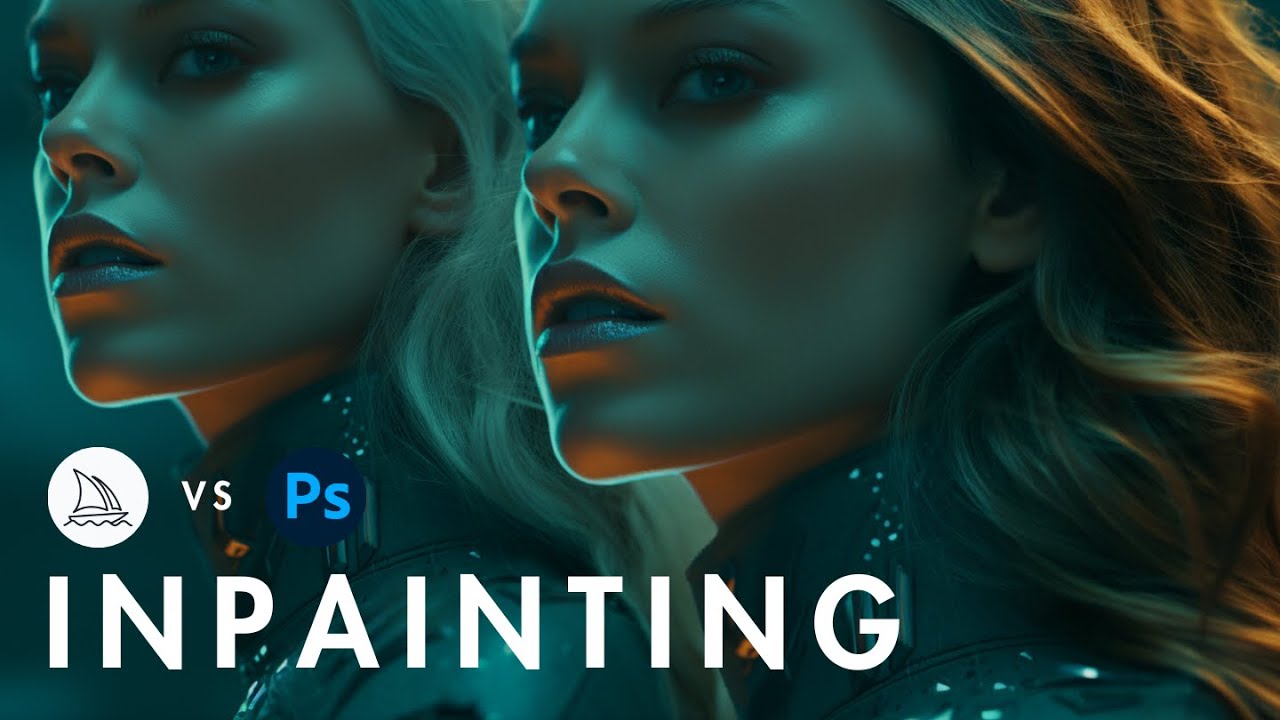


In the rapidly evolving world of digital art and AI filmmaking, inpainting has emerged as a powerful tool for creatives. This blog explores the inpainting features of Midjourney and compares them with Photoshop’s generative fill, detailing practical use cases and insights for artists looking to enhance their workflow.
Table of Contents
Introduction to Inpainting 🎨
Inpainting is a revolutionary feature in digital art, allowing for precise adjustments within a frame. This tool lets artists modify specific elements without redoing the entire scene.
Why Inpainting Matters
Inpainting provides unparalleled control over your artwork. It streamlines the creative process, saving time and effort.
Comparing Tools
Photoshop's generative fill has been a go-to for months. Now, Midjourney introduces its own inpainting capabilities. How do they stack up?
Setting Up Midjourney for Inpainting 🚀
Getting started with inpainting in Midjourney is straightforward. Follow these steps to set up your workspace.
Create a Private Server
First, create a private server on Discord to interface with Midjourney. Invite the Midjourney bot to your server.
Enable Remix Mode
Type /settings in the chat and send the command. Ensure that the remix mode is enabled to access inpainting features.
Executing Inpainting in Midjourney 🖌️
Inpainting in Midjourney is incredibly user-friendly. Whether you're removing elements or adding new ones, the process is seamless.
Preparing Your Image
First, upscale the image you want to modify. This unlocks additional editing options.
Select an image
Click "U" to upscale
Once upscaled, new buttons appear, including the "vary region" button.
Using the Vary Region Button
Clicking "vary region" opens a new window in Discord. This window provides two tools: a rectangle marquee tool and a lasso tool, both similar to Photoshop.
Selecting Areas for Inpainting
Choose the area you want to modify using these tools. The rectangle tool is straightforward, while the lasso tool allows for more complex shapes.
Use rectangle for simple shapes
Use lasso for complex shapes
Once selected, describe the new elements you want to add to the scene in detail.
Submitting Your Edits
After making your selections and descriptions, click the "submit job" button. Midjourney will generate multiple variations based on your input.
Reviewing and Finalizing
Review the generated results. Select the most realistic or appealing version and upscale it for final use.
Review generated images
Upscale the best version
This iterative process allows for fine-tuning and achieving the desired look.
Comparing Midjourney and Photoshop ⚖️
Both Midjourney and Photoshop offer powerful inpainting capabilities. However, they have distinct features and advantages.
Ease of Use
Midjourney’s integration within Discord makes it highly accessible. It’s straightforward and requires minimal setup.
Integrated with Discord
Minimal setup
Photoshop, on the other hand, requires software installation but offers a comprehensive suite of tools.
Requires installation
Comprehensive toolset
Tool Comparison
Midjourney offers basic selection tools like the rectangle and lasso, which are intuitive but limited in complexity.
Rectangle tool
Lasso tool
Photoshop provides advanced selection tools, including the magic wand, quick selection, and pen tools, allowing for precise edits.
Magic wand
Quick selection
Pen tool
Quality of Results
Midjourney excels in generating artistic and stylistic results. It’s perfect for creative projects where artistic interpretation is key.
Artistic results
Creative projects
Photoshop’s generative fill produces highly realistic and precise edits, making it ideal for professional work requiring accuracy.
Realistic edits
Professional accuracy
Flexibility and Control
Midjourney offers a more guided experience, where the AI takes creative liberties. This can be a pro or con depending on your needs.
Guided experience
AI creative input
Photoshop provides full control over the editing process, allowing for meticulous adjustments and refinements.
Full control
Meticulous adjustments
Conclusion
Choosing between Midjourney and Photoshop depends on your specific needs. For quick, creative edits, Midjourney is excellent. For detailed, professional work, Photoshop is unmatched.
Midjourney for creative edits
Photoshop for professional work
Both tools have their place in a digital artist’s toolkit, offering unique strengths to enhance your workflow.
Using Generative Fill in Photoshop 🖼️
Photoshop's generative fill is a powerful tool for inpainting. It offers precise control and realistic results, making it a favorite among professionals.
Getting Started
Open your image in Photoshop and select the area you want to modify using the rectangle marquee tool. This process is straightforward and intuitive.
Select the rectangle marquee tool
Choose the area to modify
Initiating Generative Fill
With the area selected, click on 'Generative Fill' and hit 'Generate.' Photoshop will provide multiple variations based on your selection without needing additional prompts.
Click 'Generative Fill'
Hit 'Generate'
Reviewing Results
Photoshop will generate several variations for you to choose from. Review these results and select the one that best fits your needs.
Review generated variations
Select the best fit
Once satisfied, you can export the chosen result for further use.
Assessing Output Quality: Midjourney vs Photoshop 📊
Both Midjourney and Photoshop offer impressive inpainting capabilities. However, their output quality can vary based on the specifics of the task.
Background Replacement
When it comes to replacing backgrounds, both tools perform admirably. Midjourney's results often feel more natural due to better continuity in elements like bokeh.
Midjourney: Natural continuity
Photoshop: Precise edits
Hair Modification
Changing hair color is a complex task that tests the limits of both tools. Midjourney tends to handle individual hair strands and lighting transitions more realistically.
Midjourney: Realistic strands and lighting
Photoshop: Slight pixelation
Zoomed-In Details
When zooming in on the results, Midjourney's output remains highly realistic, whereas Photoshop's results may show slight pixelation. This makes Midjourney a better choice for close-up details.
Midjourney: High realism at zoom
Photoshop: Some pixelation
Ultimately, both tools are excellent for inpainting. Your choice will depend on the specific needs of your project and your preference for either creative freedom or precise control.
Manipulating Hair Color: A Detailed Example 💇♀️
Changing hair color can be a complex task that tests the capabilities of inpainting tools. Both Midjourney and Photoshop offer unique strengths in this area.
Midjourney's Approach
Midjourney excels in handling individual hair strands and lighting transitions. This results in a more natural and realistic look.
Handles individual strands well
Realistic lighting transitions
To change hair color, use the "vary region" button, select the hair area, and describe the desired color. Midjourney will generate several variations.
Photoshop's Approach
Photoshop provides precise control over hair modifications. Use the selection tools to isolate the hair and apply generative fill for color changes.
Precise control
Isolate hair using selection tools
While Photoshop's results are highly accurate, they may show slight pixelation when zoomed in, unlike Midjourney’s smoother output.

Adding New Elements to Images 🖼️
Adding new elements to a scene can greatly enhance its storytelling. Both Midjourney and Photoshop offer tools to achieve this, but their effectiveness varies.
Using Midjourney
Midjourney allows you to add new elements by describing them in detail. However, the results can be hit or miss.
Describe new elements
Generate multiple variations
For example, adding an out-of-focus robot to a sci-fi scene may require several prompts to get satisfactory results.
Using Photoshop
Photoshop's generative fill is more reliable for adding new elements. Select the area, describe the element, and let Photoshop generate it.
Select area
Describe new element
The results are generally more accurate and require less back-and-forth compared to Midjourney.
Example: Adding a Robot
In a sci-fi scene, adding an out-of-focus robot can be tricky. Midjourney's results may vary, with some outputs not even including a robot.
Midjourney: Inconsistent results
Photoshop: More reliable
Photoshop's generative fill produced a more accurate robot, fitting well within the scene's composition.
Both tools have their strengths and weaknesses when adding new elements. Your choice will depend on your need for creative freedom or precision.
Final Comparison of Results 🔍
When comparing the final results of Midjourney and Photoshop, both have their strengths and weaknesses.
Image Quality
The Midjourney output is generally more photorealistic. It inherits color grading qualities and looks more authentic.
Direction and Compositing
While Photoshop follows directions better, it struggles with compositing elements seamlessly into the scene.
Midjourney: Photorealistic
Photoshop: Better direction
Conclusion and Recommendations 🏁
In conclusion, both Midjourney and Photoshop offer valuable tools for inpainting, each with unique advantages.
Midjourney
Midjourney excels in creating photorealistic images and is ideal for creative projects where artistic interpretation is prioritized.
Photoshop
Photoshop offers better control and precision, making it suitable for professional work requiring detailed adjustments.
Consider using both tools to complement each other, depending on your project's specific needs and goals.
Frequently Asked Questions ❓
Here are some common questions about inpainting in Midjourney and Photoshop.
What is inpainting?
Inpainting is a digital art technique used to edit specific parts of an image without altering the entire scene.
Which tool is better for beginners?
Midjourney is easier for beginners due to its integration with Discord and straightforward setup.

Can I use both tools together?
Yes, using both tools can complement each other, offering creative freedom with Midjourney and precision with Photoshop.
How do I enable remix mode in Midjourney?
Type /settings in the Discord chat and enable remix mode.

Which tool produces more realistic results?
Photoshop generally produces more realistic and precise edits, ideal for professional work.
In the rapidly evolving world of digital art and AI filmmaking, inpainting has emerged as a powerful tool for creatives. This blog explores the inpainting features of Midjourney and compares them with Photoshop’s generative fill, detailing practical use cases and insights for artists looking to enhance their workflow.
Table of Contents
Introduction to Inpainting 🎨
Inpainting is a revolutionary feature in digital art, allowing for precise adjustments within a frame. This tool lets artists modify specific elements without redoing the entire scene.
Why Inpainting Matters
Inpainting provides unparalleled control over your artwork. It streamlines the creative process, saving time and effort.
Comparing Tools
Photoshop's generative fill has been a go-to for months. Now, Midjourney introduces its own inpainting capabilities. How do they stack up?
Setting Up Midjourney for Inpainting 🚀
Getting started with inpainting in Midjourney is straightforward. Follow these steps to set up your workspace.
Create a Private Server
First, create a private server on Discord to interface with Midjourney. Invite the Midjourney bot to your server.

Enable Remix Mode
Type /settings in the chat and send the command. Ensure that the remix mode is enabled to access inpainting features.
Executing Inpainting in Midjourney 🖌️
Inpainting in Midjourney is incredibly user-friendly. Whether you're removing elements or adding new ones, the process is seamless.
Preparing Your Image
First, upscale the image you want to modify. This unlocks additional editing options.
Select an image
Click "U" to upscale
Once upscaled, new buttons appear, including the "vary region" button.
Using the Vary Region Button
Clicking "vary region" opens a new window in Discord. This window provides two tools: a rectangle marquee tool and a lasso tool, both similar to Photoshop.

Selecting Areas for Inpainting
Choose the area you want to modify using these tools. The rectangle tool is straightforward, while the lasso tool allows for more complex shapes.
Use rectangle for simple shapes
Use lasso for complex shapes
Once selected, describe the new elements you want to add to the scene in detail.
Submitting Your Edits
After making your selections and descriptions, click the "submit job" button. Midjourney will generate multiple variations based on your input.

Reviewing and Finalizing
Review the generated results. Select the most realistic or appealing version and upscale it for final use.
Review generated images
Upscale the best version
This iterative process allows for fine-tuning and achieving the desired look.
Comparing Midjourney and Photoshop ⚖️
Both Midjourney and Photoshop offer powerful inpainting capabilities. However, they have distinct features and advantages.
Ease of Use
Midjourney’s integration within Discord makes it highly accessible. It’s straightforward and requires minimal setup.
Integrated with Discord
Minimal setup
Photoshop, on the other hand, requires software installation but offers a comprehensive suite of tools.
Requires installation
Comprehensive toolset
Tool Comparison
Midjourney offers basic selection tools like the rectangle and lasso, which are intuitive but limited in complexity.
Rectangle tool
Lasso tool
Photoshop provides advanced selection tools, including the magic wand, quick selection, and pen tools, allowing for precise edits.
Magic wand
Quick selection
Pen tool
Quality of Results
Midjourney excels in generating artistic and stylistic results. It’s perfect for creative projects where artistic interpretation is key.
Artistic results
Creative projects
Photoshop’s generative fill produces highly realistic and precise edits, making it ideal for professional work requiring accuracy.
Realistic edits
Professional accuracy
Flexibility and Control
Midjourney offers a more guided experience, where the AI takes creative liberties. This can be a pro or con depending on your needs.
Guided experience
AI creative input
Photoshop provides full control over the editing process, allowing for meticulous adjustments and refinements.
Full control
Meticulous adjustments
Conclusion
Choosing between Midjourney and Photoshop depends on your specific needs. For quick, creative edits, Midjourney is excellent. For detailed, professional work, Photoshop is unmatched.
Midjourney for creative edits
Photoshop for professional work
Both tools have their place in a digital artist’s toolkit, offering unique strengths to enhance your workflow.
Using Generative Fill in Photoshop 🖼️
Photoshop's generative fill is a powerful tool for inpainting. It offers precise control and realistic results, making it a favorite among professionals.
Getting Started
Open your image in Photoshop and select the area you want to modify using the rectangle marquee tool. This process is straightforward and intuitive.
Select the rectangle marquee tool
Choose the area to modify

Initiating Generative Fill
With the area selected, click on 'Generative Fill' and hit 'Generate.' Photoshop will provide multiple variations based on your selection without needing additional prompts.
Click 'Generative Fill'
Hit 'Generate'

Reviewing Results
Photoshop will generate several variations for you to choose from. Review these results and select the one that best fits your needs.
Review generated variations
Select the best fit
Once satisfied, you can export the chosen result for further use.
Assessing Output Quality: Midjourney vs Photoshop 📊
Both Midjourney and Photoshop offer impressive inpainting capabilities. However, their output quality can vary based on the specifics of the task.
Background Replacement
When it comes to replacing backgrounds, both tools perform admirably. Midjourney's results often feel more natural due to better continuity in elements like bokeh.
Midjourney: Natural continuity
Photoshop: Precise edits

Hair Modification
Changing hair color is a complex task that tests the limits of both tools. Midjourney tends to handle individual hair strands and lighting transitions more realistically.
Midjourney: Realistic strands and lighting
Photoshop: Slight pixelation

Zoomed-In Details
When zooming in on the results, Midjourney's output remains highly realistic, whereas Photoshop's results may show slight pixelation. This makes Midjourney a better choice for close-up details.
Midjourney: High realism at zoom
Photoshop: Some pixelation
Ultimately, both tools are excellent for inpainting. Your choice will depend on the specific needs of your project and your preference for either creative freedom or precise control.
Manipulating Hair Color: A Detailed Example 💇♀️
Changing hair color can be a complex task that tests the capabilities of inpainting tools. Both Midjourney and Photoshop offer unique strengths in this area.
Midjourney's Approach
Midjourney excels in handling individual hair strands and lighting transitions. This results in a more natural and realistic look.
Handles individual strands well
Realistic lighting transitions
To change hair color, use the "vary region" button, select the hair area, and describe the desired color. Midjourney will generate several variations.
Photoshop's Approach
Photoshop provides precise control over hair modifications. Use the selection tools to isolate the hair and apply generative fill for color changes.
Precise control
Isolate hair using selection tools
While Photoshop's results are highly accurate, they may show slight pixelation when zoomed in, unlike Midjourney’s smoother output.

Adding New Elements to Images 🖼️
Adding new elements to a scene can greatly enhance its storytelling. Both Midjourney and Photoshop offer tools to achieve this, but their effectiveness varies.
Using Midjourney
Midjourney allows you to add new elements by describing them in detail. However, the results can be hit or miss.
Describe new elements
Generate multiple variations
For example, adding an out-of-focus robot to a sci-fi scene may require several prompts to get satisfactory results.

Using Photoshop
Photoshop's generative fill is more reliable for adding new elements. Select the area, describe the element, and let Photoshop generate it.
Select area
Describe new element
The results are generally more accurate and require less back-and-forth compared to Midjourney.

Example: Adding a Robot
In a sci-fi scene, adding an out-of-focus robot can be tricky. Midjourney's results may vary, with some outputs not even including a robot.
Midjourney: Inconsistent results
Photoshop: More reliable
Photoshop's generative fill produced a more accurate robot, fitting well within the scene's composition.
Both tools have their strengths and weaknesses when adding new elements. Your choice will depend on your need for creative freedom or precision.
Final Comparison of Results 🔍
When comparing the final results of Midjourney and Photoshop, both have their strengths and weaknesses.
Image Quality
The Midjourney output is generally more photorealistic. It inherits color grading qualities and looks more authentic.

Direction and Compositing
While Photoshop follows directions better, it struggles with compositing elements seamlessly into the scene.
Midjourney: Photorealistic
Photoshop: Better direction

Conclusion and Recommendations 🏁
In conclusion, both Midjourney and Photoshop offer valuable tools for inpainting, each with unique advantages.
Midjourney
Midjourney excels in creating photorealistic images and is ideal for creative projects where artistic interpretation is prioritized.
Photoshop
Photoshop offers better control and precision, making it suitable for professional work requiring detailed adjustments.
Consider using both tools to complement each other, depending on your project's specific needs and goals.
Frequently Asked Questions ❓
Here are some common questions about inpainting in Midjourney and Photoshop.
What is inpainting?
Inpainting is a digital art technique used to edit specific parts of an image without altering the entire scene.
Which tool is better for beginners?
Midjourney is easier for beginners due to its integration with Discord and straightforward setup.

Can I use both tools together?
Yes, using both tools can complement each other, offering creative freedom with Midjourney and precision with Photoshop.
How do I enable remix mode in Midjourney?
Type /settings in the Discord chat and enable remix mode.

Which tool produces more realistic results?
Photoshop generally produces more realistic and precise edits, ideal for professional work.
In the rapidly evolving world of digital art and AI filmmaking, inpainting has emerged as a powerful tool for creatives. This blog explores the inpainting features of Midjourney and compares them with Photoshop’s generative fill, detailing practical use cases and insights for artists looking to enhance their workflow.
Table of Contents
Introduction to Inpainting 🎨
Inpainting is a revolutionary feature in digital art, allowing for precise adjustments within a frame. This tool lets artists modify specific elements without redoing the entire scene.
Why Inpainting Matters
Inpainting provides unparalleled control over your artwork. It streamlines the creative process, saving time and effort.
Comparing Tools
Photoshop's generative fill has been a go-to for months. Now, Midjourney introduces its own inpainting capabilities. How do they stack up?
Setting Up Midjourney for Inpainting 🚀
Getting started with inpainting in Midjourney is straightforward. Follow these steps to set up your workspace.
Create a Private Server
First, create a private server on Discord to interface with Midjourney. Invite the Midjourney bot to your server.

Enable Remix Mode
Type /settings in the chat and send the command. Ensure that the remix mode is enabled to access inpainting features.
Executing Inpainting in Midjourney 🖌️
Inpainting in Midjourney is incredibly user-friendly. Whether you're removing elements or adding new ones, the process is seamless.
Preparing Your Image
First, upscale the image you want to modify. This unlocks additional editing options.
Select an image
Click "U" to upscale
Once upscaled, new buttons appear, including the "vary region" button.
Using the Vary Region Button
Clicking "vary region" opens a new window in Discord. This window provides two tools: a rectangle marquee tool and a lasso tool, both similar to Photoshop.

Selecting Areas for Inpainting
Choose the area you want to modify using these tools. The rectangle tool is straightforward, while the lasso tool allows for more complex shapes.
Use rectangle for simple shapes
Use lasso for complex shapes
Once selected, describe the new elements you want to add to the scene in detail.
Submitting Your Edits
After making your selections and descriptions, click the "submit job" button. Midjourney will generate multiple variations based on your input.

Reviewing and Finalizing
Review the generated results. Select the most realistic or appealing version and upscale it for final use.
Review generated images
Upscale the best version
This iterative process allows for fine-tuning and achieving the desired look.
Comparing Midjourney and Photoshop ⚖️
Both Midjourney and Photoshop offer powerful inpainting capabilities. However, they have distinct features and advantages.
Ease of Use
Midjourney’s integration within Discord makes it highly accessible. It’s straightforward and requires minimal setup.
Integrated with Discord
Minimal setup
Photoshop, on the other hand, requires software installation but offers a comprehensive suite of tools.
Requires installation
Comprehensive toolset
Tool Comparison
Midjourney offers basic selection tools like the rectangle and lasso, which are intuitive but limited in complexity.
Rectangle tool
Lasso tool
Photoshop provides advanced selection tools, including the magic wand, quick selection, and pen tools, allowing for precise edits.
Magic wand
Quick selection
Pen tool
Quality of Results
Midjourney excels in generating artistic and stylistic results. It’s perfect for creative projects where artistic interpretation is key.
Artistic results
Creative projects
Photoshop’s generative fill produces highly realistic and precise edits, making it ideal for professional work requiring accuracy.
Realistic edits
Professional accuracy
Flexibility and Control
Midjourney offers a more guided experience, where the AI takes creative liberties. This can be a pro or con depending on your needs.
Guided experience
AI creative input
Photoshop provides full control over the editing process, allowing for meticulous adjustments and refinements.
Full control
Meticulous adjustments
Conclusion
Choosing between Midjourney and Photoshop depends on your specific needs. For quick, creative edits, Midjourney is excellent. For detailed, professional work, Photoshop is unmatched.
Midjourney for creative edits
Photoshop for professional work
Both tools have their place in a digital artist’s toolkit, offering unique strengths to enhance your workflow.
Using Generative Fill in Photoshop 🖼️
Photoshop's generative fill is a powerful tool for inpainting. It offers precise control and realistic results, making it a favorite among professionals.
Getting Started
Open your image in Photoshop and select the area you want to modify using the rectangle marquee tool. This process is straightforward and intuitive.
Select the rectangle marquee tool
Choose the area to modify

Initiating Generative Fill
With the area selected, click on 'Generative Fill' and hit 'Generate.' Photoshop will provide multiple variations based on your selection without needing additional prompts.
Click 'Generative Fill'
Hit 'Generate'

Reviewing Results
Photoshop will generate several variations for you to choose from. Review these results and select the one that best fits your needs.
Review generated variations
Select the best fit
Once satisfied, you can export the chosen result for further use.
Assessing Output Quality: Midjourney vs Photoshop 📊
Both Midjourney and Photoshop offer impressive inpainting capabilities. However, their output quality can vary based on the specifics of the task.
Background Replacement
When it comes to replacing backgrounds, both tools perform admirably. Midjourney's results often feel more natural due to better continuity in elements like bokeh.
Midjourney: Natural continuity
Photoshop: Precise edits

Hair Modification
Changing hair color is a complex task that tests the limits of both tools. Midjourney tends to handle individual hair strands and lighting transitions more realistically.
Midjourney: Realistic strands and lighting
Photoshop: Slight pixelation

Zoomed-In Details
When zooming in on the results, Midjourney's output remains highly realistic, whereas Photoshop's results may show slight pixelation. This makes Midjourney a better choice for close-up details.
Midjourney: High realism at zoom
Photoshop: Some pixelation
Ultimately, both tools are excellent for inpainting. Your choice will depend on the specific needs of your project and your preference for either creative freedom or precise control.
Manipulating Hair Color: A Detailed Example 💇♀️
Changing hair color can be a complex task that tests the capabilities of inpainting tools. Both Midjourney and Photoshop offer unique strengths in this area.
Midjourney's Approach
Midjourney excels in handling individual hair strands and lighting transitions. This results in a more natural and realistic look.
Handles individual strands well
Realistic lighting transitions
To change hair color, use the "vary region" button, select the hair area, and describe the desired color. Midjourney will generate several variations.
Photoshop's Approach
Photoshop provides precise control over hair modifications. Use the selection tools to isolate the hair and apply generative fill for color changes.
Precise control
Isolate hair using selection tools
While Photoshop's results are highly accurate, they may show slight pixelation when zoomed in, unlike Midjourney’s smoother output.

Adding New Elements to Images 🖼️
Adding new elements to a scene can greatly enhance its storytelling. Both Midjourney and Photoshop offer tools to achieve this, but their effectiveness varies.
Using Midjourney
Midjourney allows you to add new elements by describing them in detail. However, the results can be hit or miss.
Describe new elements
Generate multiple variations
For example, adding an out-of-focus robot to a sci-fi scene may require several prompts to get satisfactory results.

Using Photoshop
Photoshop's generative fill is more reliable for adding new elements. Select the area, describe the element, and let Photoshop generate it.
Select area
Describe new element
The results are generally more accurate and require less back-and-forth compared to Midjourney.

Example: Adding a Robot
In a sci-fi scene, adding an out-of-focus robot can be tricky. Midjourney's results may vary, with some outputs not even including a robot.
Midjourney: Inconsistent results
Photoshop: More reliable
Photoshop's generative fill produced a more accurate robot, fitting well within the scene's composition.
Both tools have their strengths and weaknesses when adding new elements. Your choice will depend on your need for creative freedom or precision.
Final Comparison of Results 🔍
When comparing the final results of Midjourney and Photoshop, both have their strengths and weaknesses.
Image Quality
The Midjourney output is generally more photorealistic. It inherits color grading qualities and looks more authentic.

Direction and Compositing
While Photoshop follows directions better, it struggles with compositing elements seamlessly into the scene.
Midjourney: Photorealistic
Photoshop: Better direction

Conclusion and Recommendations 🏁
In conclusion, both Midjourney and Photoshop offer valuable tools for inpainting, each with unique advantages.
Midjourney
Midjourney excels in creating photorealistic images and is ideal for creative projects where artistic interpretation is prioritized.
Photoshop
Photoshop offers better control and precision, making it suitable for professional work requiring detailed adjustments.
Consider using both tools to complement each other, depending on your project's specific needs and goals.
Frequently Asked Questions ❓
Here are some common questions about inpainting in Midjourney and Photoshop.
What is inpainting?
Inpainting is a digital art technique used to edit specific parts of an image without altering the entire scene.
Which tool is better for beginners?
Midjourney is easier for beginners due to its integration with Discord and straightforward setup.

Can I use both tools together?
Yes, using both tools can complement each other, offering creative freedom with Midjourney and precision with Photoshop.
How do I enable remix mode in Midjourney?
Type /settings in the Discord chat and enable remix mode.

Which tool produces more realistic results?
Photoshop generally produces more realistic and precise edits, ideal for professional work.
In the rapidly evolving world of digital art and AI filmmaking, inpainting has emerged as a powerful tool for creatives. This blog explores the inpainting features of Midjourney and compares them with Photoshop’s generative fill, detailing practical use cases and insights for artists looking to enhance their workflow.
Table of Contents
Introduction to Inpainting 🎨
Inpainting is a revolutionary feature in digital art, allowing for precise adjustments within a frame. This tool lets artists modify specific elements without redoing the entire scene.
Why Inpainting Matters
Inpainting provides unparalleled control over your artwork. It streamlines the creative process, saving time and effort.
Comparing Tools
Photoshop's generative fill has been a go-to for months. Now, Midjourney introduces its own inpainting capabilities. How do they stack up?
Setting Up Midjourney for Inpainting 🚀
Getting started with inpainting in Midjourney is straightforward. Follow these steps to set up your workspace.
Create a Private Server
First, create a private server on Discord to interface with Midjourney. Invite the Midjourney bot to your server.

Enable Remix Mode
Type /settings in the chat and send the command. Ensure that the remix mode is enabled to access inpainting features.
Executing Inpainting in Midjourney 🖌️
Inpainting in Midjourney is incredibly user-friendly. Whether you're removing elements or adding new ones, the process is seamless.
Preparing Your Image
First, upscale the image you want to modify. This unlocks additional editing options.
Select an image
Click "U" to upscale
Once upscaled, new buttons appear, including the "vary region" button.
Using the Vary Region Button
Clicking "vary region" opens a new window in Discord. This window provides two tools: a rectangle marquee tool and a lasso tool, both similar to Photoshop.

Selecting Areas for Inpainting
Choose the area you want to modify using these tools. The rectangle tool is straightforward, while the lasso tool allows for more complex shapes.
Use rectangle for simple shapes
Use lasso for complex shapes
Once selected, describe the new elements you want to add to the scene in detail.
Submitting Your Edits
After making your selections and descriptions, click the "submit job" button. Midjourney will generate multiple variations based on your input.

Reviewing and Finalizing
Review the generated results. Select the most realistic or appealing version and upscale it for final use.
Review generated images
Upscale the best version
This iterative process allows for fine-tuning and achieving the desired look.
Comparing Midjourney and Photoshop ⚖️
Both Midjourney and Photoshop offer powerful inpainting capabilities. However, they have distinct features and advantages.
Ease of Use
Midjourney’s integration within Discord makes it highly accessible. It’s straightforward and requires minimal setup.
Integrated with Discord
Minimal setup
Photoshop, on the other hand, requires software installation but offers a comprehensive suite of tools.
Requires installation
Comprehensive toolset
Tool Comparison
Midjourney offers basic selection tools like the rectangle and lasso, which are intuitive but limited in complexity.
Rectangle tool
Lasso tool
Photoshop provides advanced selection tools, including the magic wand, quick selection, and pen tools, allowing for precise edits.
Magic wand
Quick selection
Pen tool
Quality of Results
Midjourney excels in generating artistic and stylistic results. It’s perfect for creative projects where artistic interpretation is key.
Artistic results
Creative projects
Photoshop’s generative fill produces highly realistic and precise edits, making it ideal for professional work requiring accuracy.
Realistic edits
Professional accuracy
Flexibility and Control
Midjourney offers a more guided experience, where the AI takes creative liberties. This can be a pro or con depending on your needs.
Guided experience
AI creative input
Photoshop provides full control over the editing process, allowing for meticulous adjustments and refinements.
Full control
Meticulous adjustments
Conclusion
Choosing between Midjourney and Photoshop depends on your specific needs. For quick, creative edits, Midjourney is excellent. For detailed, professional work, Photoshop is unmatched.
Midjourney for creative edits
Photoshop for professional work
Both tools have their place in a digital artist’s toolkit, offering unique strengths to enhance your workflow.
Using Generative Fill in Photoshop 🖼️
Photoshop's generative fill is a powerful tool for inpainting. It offers precise control and realistic results, making it a favorite among professionals.
Getting Started
Open your image in Photoshop and select the area you want to modify using the rectangle marquee tool. This process is straightforward and intuitive.
Select the rectangle marquee tool
Choose the area to modify

Initiating Generative Fill
With the area selected, click on 'Generative Fill' and hit 'Generate.' Photoshop will provide multiple variations based on your selection without needing additional prompts.
Click 'Generative Fill'
Hit 'Generate'

Reviewing Results
Photoshop will generate several variations for you to choose from. Review these results and select the one that best fits your needs.
Review generated variations
Select the best fit
Once satisfied, you can export the chosen result for further use.
Assessing Output Quality: Midjourney vs Photoshop 📊
Both Midjourney and Photoshop offer impressive inpainting capabilities. However, their output quality can vary based on the specifics of the task.
Background Replacement
When it comes to replacing backgrounds, both tools perform admirably. Midjourney's results often feel more natural due to better continuity in elements like bokeh.
Midjourney: Natural continuity
Photoshop: Precise edits

Hair Modification
Changing hair color is a complex task that tests the limits of both tools. Midjourney tends to handle individual hair strands and lighting transitions more realistically.
Midjourney: Realistic strands and lighting
Photoshop: Slight pixelation

Zoomed-In Details
When zooming in on the results, Midjourney's output remains highly realistic, whereas Photoshop's results may show slight pixelation. This makes Midjourney a better choice for close-up details.
Midjourney: High realism at zoom
Photoshop: Some pixelation
Ultimately, both tools are excellent for inpainting. Your choice will depend on the specific needs of your project and your preference for either creative freedom or precise control.
Manipulating Hair Color: A Detailed Example 💇♀️
Changing hair color can be a complex task that tests the capabilities of inpainting tools. Both Midjourney and Photoshop offer unique strengths in this area.
Midjourney's Approach
Midjourney excels in handling individual hair strands and lighting transitions. This results in a more natural and realistic look.
Handles individual strands well
Realistic lighting transitions
To change hair color, use the "vary region" button, select the hair area, and describe the desired color. Midjourney will generate several variations.
Photoshop's Approach
Photoshop provides precise control over hair modifications. Use the selection tools to isolate the hair and apply generative fill for color changes.
Precise control
Isolate hair using selection tools
While Photoshop's results are highly accurate, they may show slight pixelation when zoomed in, unlike Midjourney’s smoother output.

Adding New Elements to Images 🖼️
Adding new elements to a scene can greatly enhance its storytelling. Both Midjourney and Photoshop offer tools to achieve this, but their effectiveness varies.
Using Midjourney
Midjourney allows you to add new elements by describing them in detail. However, the results can be hit or miss.
Describe new elements
Generate multiple variations
For example, adding an out-of-focus robot to a sci-fi scene may require several prompts to get satisfactory results.

Using Photoshop
Photoshop's generative fill is more reliable for adding new elements. Select the area, describe the element, and let Photoshop generate it.
Select area
Describe new element
The results are generally more accurate and require less back-and-forth compared to Midjourney.

Example: Adding a Robot
In a sci-fi scene, adding an out-of-focus robot can be tricky. Midjourney's results may vary, with some outputs not even including a robot.
Midjourney: Inconsistent results
Photoshop: More reliable
Photoshop's generative fill produced a more accurate robot, fitting well within the scene's composition.
Both tools have their strengths and weaknesses when adding new elements. Your choice will depend on your need for creative freedom or precision.
Final Comparison of Results 🔍
When comparing the final results of Midjourney and Photoshop, both have their strengths and weaknesses.
Image Quality
The Midjourney output is generally more photorealistic. It inherits color grading qualities and looks more authentic.

Direction and Compositing
While Photoshop follows directions better, it struggles with compositing elements seamlessly into the scene.
Midjourney: Photorealistic
Photoshop: Better direction

Conclusion and Recommendations 🏁
In conclusion, both Midjourney and Photoshop offer valuable tools for inpainting, each with unique advantages.
Midjourney
Midjourney excels in creating photorealistic images and is ideal for creative projects where artistic interpretation is prioritized.
Photoshop
Photoshop offers better control and precision, making it suitable for professional work requiring detailed adjustments.
Consider using both tools to complement each other, depending on your project's specific needs and goals.
Frequently Asked Questions ❓
Here are some common questions about inpainting in Midjourney and Photoshop.
What is inpainting?
Inpainting is a digital art technique used to edit specific parts of an image without altering the entire scene.
Which tool is better for beginners?
Midjourney is easier for beginners due to its integration with Discord and straightforward setup.

Can I use both tools together?
Yes, using both tools can complement each other, offering creative freedom with Midjourney and precision with Photoshop.
How do I enable remix mode in Midjourney?
Type /settings in the Discord chat and enable remix mode.

Which tool produces more realistic results?
Photoshop generally produces more realistic and precise edits, ideal for professional work.


